If you can’t be arsed to read all this, there’s some useful (I hope) tips on removing bushings at the end.
This is going to be extremely boring. The first month of ownership at least was one aggravating exercise of lather-rinse-repeat until you’re just about ready to say “Fuck this” and light the thing on fire. Now, don’t get me wrong, I’m all for taking care of your things, and if that means covering the underbody, every single nook and cranny and every moving part related to the suspension and drivetrain in a black sticky mixture of tar and God knows what else, by all means, knock yourself out. Right up until that very moment when it becomes my project car and I start tearing into it and I have to spend spend countless hours with a Windex bottle with the actual Windex replaced by petroleum, a brush and 5000 square meters of old rags..
I was just about ready to unleash a very particular set of skills I’ve acquired over a very long career on the guy who sold it to me, except, I didn’t really have to since I kinda knew who he was and where he lived. Besides, I’d already given him all my money and the car was on stands so how would I get there?….
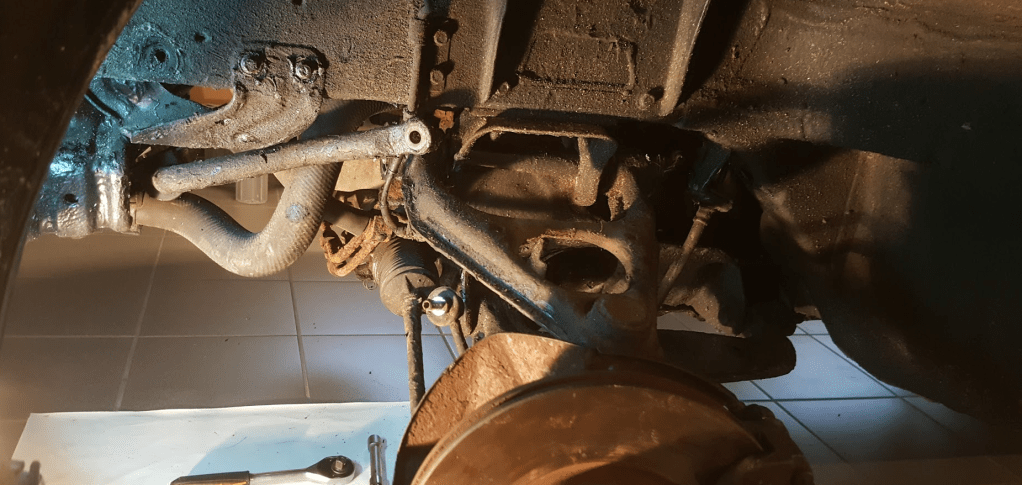
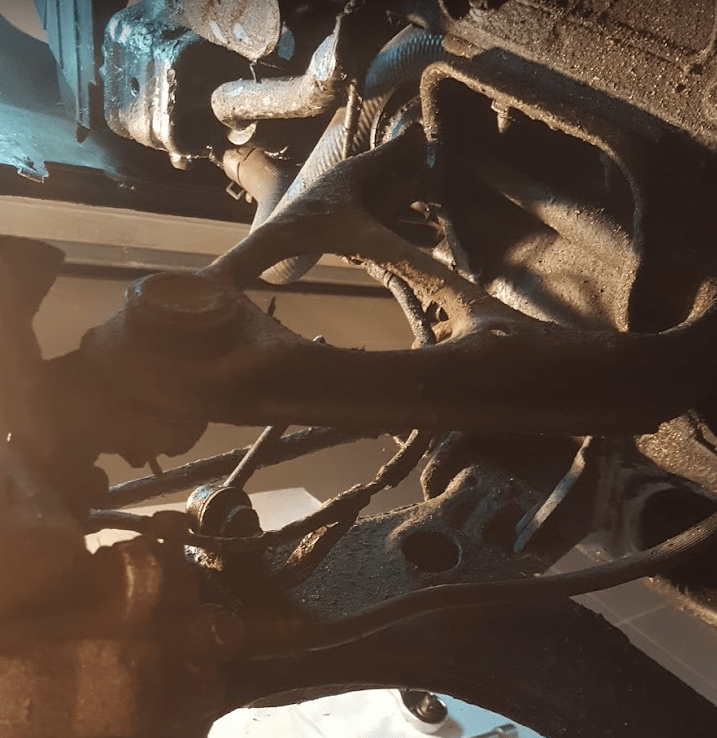
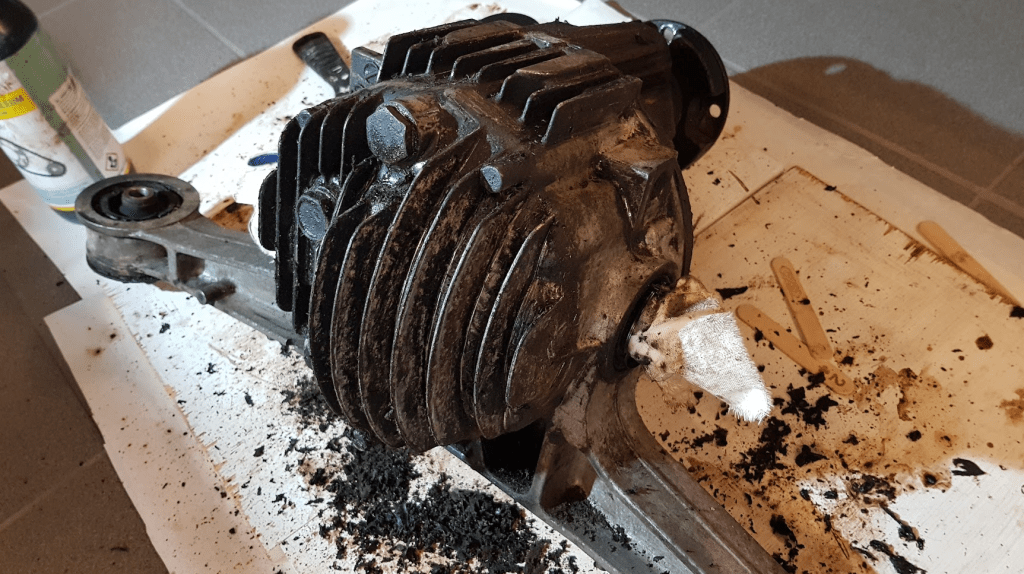
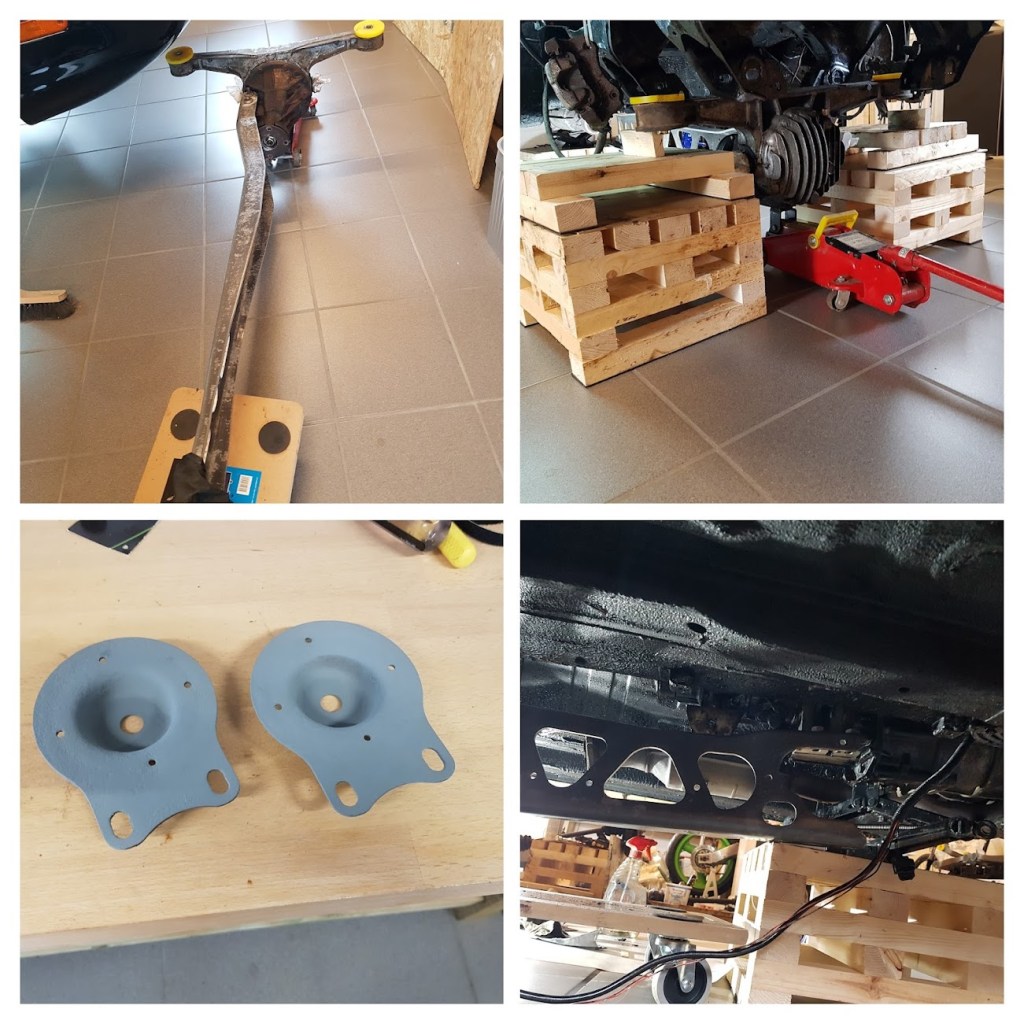
It was all fun and games until the differential had to come out. Why bother I hear you ask, but replacing all bushings means replacing all bushings: including the two fist sized ones where the differential meets the rear subframe. Now, the differential on an MX5, is hung from the rear subframe and also attaches to a long-ass U-shaped steel bracket called the PPF (Power Plant Frame) that is fixed to the gearbox in the other end creating a solid drivetrain. The PPF and diff are lightly held together by 2 10/12mm odd shaped (well, one of them, the other is pretty normal) bolts that’s been torqued to 120Nm from birth. Add to that 20 odd years of hot and cold cycles, road grime, salt etc. and you have a perfect recipe for bolts not wanting to come out. I had a long chat with the rearmost one and that one came out with out too much trouble. The other one however, now that’s another story. <It would be funny to quote Marsellus Wallace here, but I’m not very black, so I can’t> Penetrating rust remover sprayed on top letting that soak until it came out the bottom, battery powered impact gun, air powered ditto, breaker bar with 2.5m extension, plenty of heat etc. Nothing made any impression. So the only option was to remove the diff and PPF together – that was easy(‘ish):

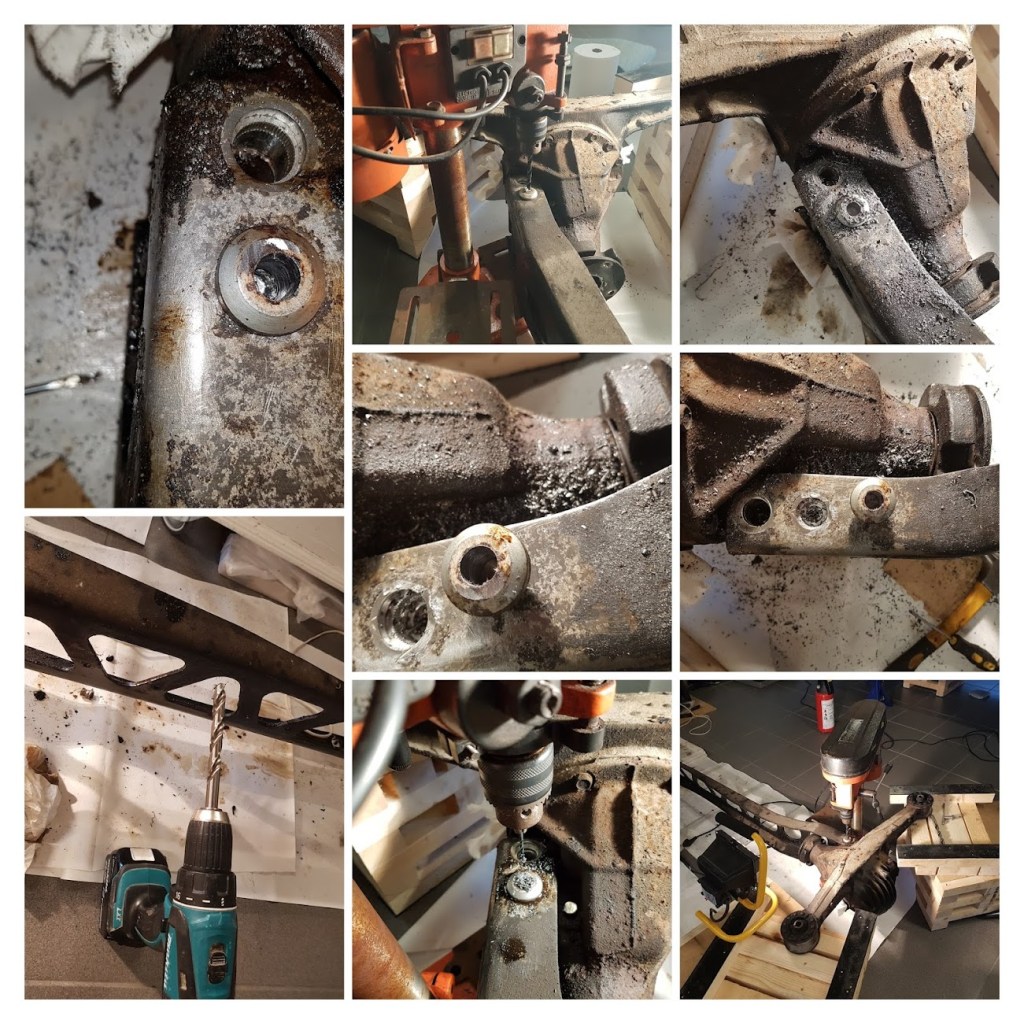
Now, had this been easy, one would cut the head off the bolt on the bottom and then just start whacking it repeatedly with the biggest hammer in your toolbox since the nut in the top is knurled and pushed into the PPF. The only problem is, that the bolt might be 12mm in the bottom but only 10 where it meets the nut. So the only way is to clear the threads in the nut – and THEN start banging with the biggest hammer in the toolbox. I’ll let the pictures tell the rest, but it required a pillar drill and an angle grinder:


Bushing removal – what I learned:
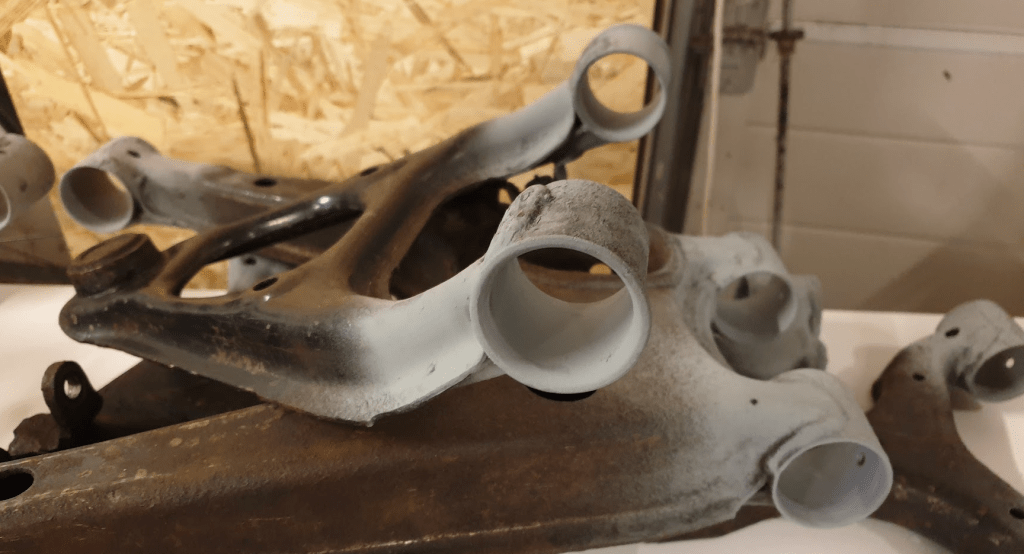
The control arm bushings are actually a piece of piss to get out once you find the hack. Search the web and you and find all sorts of ways to get them out. The blowtorch way burning them seems especially fun and healthy, both for you and the planet – but since our garage is actually part of the house, that idea was dropped like a red headed step child.
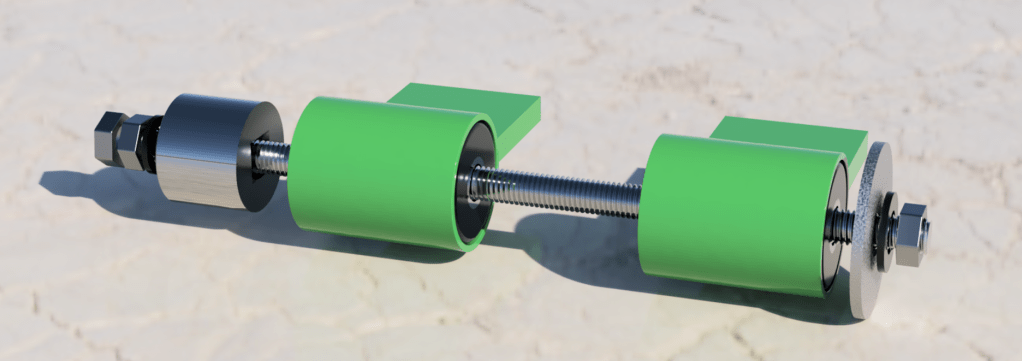
In the end, the only thing I used was a 1m threaded rod, a big socket that fit inside the tube where the bushing lives, and big spacer that won’t fit in the tube where the bushing lives, a couple of smaller spacers and 3 10mm nuts – and the most import thing: a little heat! I’m not talking gas powered blowtorch red-hot metal heat. I used a simple 1600w Bosch heat gun that you would use to strip paint off an old door (Why I bought it back in the days actually).
I don’t have any pictures of the setup – I was too busy swearing to take any, but this should give you an idea of what each end should look like:

Now, I used the setup without heat for the first couple of bushings, but it was hard work. They are in there, and they are in there good. I managed to bend one of the rear upper control arms doing it like this note:1, that’s the kind of “in there” they are. Until you apply heat that is. They soften up completely, and if you’ve got thick skinned fingers, I bet you could (DO NOT TRY THIS BECAUSE I SAID SO – shit it still shit hot!) push them out with your thumbs.
Apart from them having been in there for 20 years and having created an almost unbreakable bond with the control arms, deposits of rust isn’t helping:

note:1 Yes. I actually am THAT smart. I could tell it was going somewhere bad, but still kept applying pressure. (I reversed the mishap with the standard MX5 jack between the legs of the control arm, so there!)
Differential Bushings. Not as much as piece of piss as I only had two to practice on, but once the solution is presented: stupid easy. As with the control arm bushings, many methods are available from Google. Common thing is, get rid of the rubber material, then get to work on the metal shell. Now, since fire is definitely out, I started by drilling as many holes as I could in the rubber. Don’t worry about scratching the metal shell, it’s coming out and going in the trash. Then the trusty jigsaw and went to work (again) on the remaining rubber <I just realized the Marsellus Wallace quote with the pliers and the blow torch would work equally fine here. I’m still not black though>
When you search for solutions on how to get the metal shell out, the one that inspired me, and I thought sounded like a good idea, was again using the jigsaw to cut two lines in the shell leaving you with two halves to pry out, so I started doing that, but here comes the monumental shocker: There is already a cut all the way down in the shell, no need to use the jigsaw. You just have to look for it because it’s thin and it’s covered in dirt and underbody protection and 20 years worth of road grime. But it’s there. So once most of the rubber is out, find the cut the in the shell, get a flat headed screwdriver and a hammer and you can easily, and I mean easily, no need to go medieval on it, bend in the first corner, then with a little well aimed violence and a pair of pliers <there it is again> getting the shell out is no problem at all – a tiny but of persuasion is all that’s needed.
This should give you an idea – start by getting a corner loosened and work your way around with a chisel, flat head screwdriver or your nails if you’re a man’s man (I’m not, screwdriver and hammer thank you very much)